Saturday, June 30, 2012

Winsock/Tcp repair utility

What is winsock ?

Short for Windows Socket, an API for developing Windows programs that can communicate with other machines via the TCP/IP protocol. Windows 95 andWindows NT comes with Dynamic Link Library (DLL) called winsock.dll that implements the API and acts as the glue between Windows programs and TCP/IP connections.

How to repair ?

netsh winsock reset is useful command that you can use in Microsoft Windows to reset winsock catalog back to default setting or clean state. You can try this if you are having following Internet access or networking problems but still failing to resolve the problem after trying all other suggestions.

Internet or network problem after removing the adware, spyware, virus, worm, trojan horse, etc
- Loss network connection after installing/uninstalling adware, spyware, antispam, vpn, firewall or other networking programs
- Unable to access any webpage or can only access some webpages
- Pop-up error window with network related problem description
- No network connectivity due to registry errors
- DNS lookup problem
- Fail to renew the network adapter’s IP address or other DHCP errors
- Network connectivity issue with limited or no connections message
- Other networking problems

If you are using Windows XP, here is the way you can launch command prompt after logging in as administrator.

1)Go to Start and click Run…
2)Type cmd.exe and click OK.
3) Type the following command on the command prompt:
                    netsh winsock reset

Alternately you can also download this utility to repair winsock
Download Winsock/Tcp repair utility

Friday, June 29, 2012

Svchost.exe taking 100% CPU usage ? Analyze & Fix it

Svchost Viewer is a small utility that allow users to check what all those svchost instances are all about and what services are each one of them running. In Windows 7 Task Manager you need to check Show Process From All Users to view the svchost.exe processes, be default they are hidden.

With this tool you can analyze, find more information about the service behind each svchost.exe process that is taking excessive memory or CPU, and turn it off.

Download Svchost Viewer

Thursday, June 28, 2012

What is Windows Defender Offline?

Sometimes, malicious and other potentially unwanted software, including rootkits, try to install themselves on your PC. This can happen when you connect to the Internet or install some programs from a CD, DVD, or other media. Once on your PC, this software might run immediately, or it might run at unexpected times. Windows Defender Offline can help remove such hard to find malicious and potentially unwanted programs using definitions that recognize threats. Definitions are files that provide an encyclopedia of potential software threats. Because new threats appear daily, it's important to always have the most up-to-date definitions installed in Windows Defender Offline. Armed with definition files, Windows Defender Offline can detect malicious and potentially unwanted software, and then notify you of the risks.

Windows Defender Offline system requirements


For both the PC infected with a virus or malware, and the PC that you are creating the bootable media on, you'll need PCs with the following minimum requirements.
Operating system:

Windows XP Service Pack 3
Windows Vista, Windows Vista with SP1, Windows Vista with SP2, or higher
Windows 7, Windows 7 with SP1, or higher
Windows Developer Preview, Windows 8 Consumer Preview, Windows 8 Release Preview

How to Create A System Sweeper Bootable CD,USB or ISO for a PC

1) Download the EXE file here.

2) Select the appropriate bootable medium. Once you start the creation, it will download the package and latest updates from Microsoft official site. So, make sure you have direct or proxy internet connection with download access.


3) If you select CD, then insert the blank CD in next screen, if it is an USB drive, just remember this program will format the USB drive and install System Sweeper.


ISO can be ideal to mount and use in working computer or any virtual machines.

4) Successful message will appear after the completion.

5) If it is a physical computer which can’t be booted or cleaned while OS is working, then insert the CD or USB and boot from it. Mount the ISO file to CD drive and boot the virtual machine for cleaning.

Press any key to boot from CD. It loads like latest Microsoft Operating Systems. Malware and virus clean up should start nicely.

source

Tuesday, June 26, 2012

First free Tool for Windows 7 Multiple Desktops by Microsoft

This product is better  because of Microsoft
You can create maximum 4 multiple desktops by this tool. Installation is very simple.

Once you installed the application, new icon will appear in notification area.

Right clicking this icon will bring the settings of Desktops v1.02.


The hotkeys can be setup here to switch among different desktops by keyboard shortcuts.
The original desktop will be marked as Desktop 1. Other three desktops will be created when you try to access them at first time either by using keyboard hotkeys or accessing from notification area.


The above screen shows the running three Windows 7 multiple desktops. I do not have the forth virtual desktop yet, but that can be created by pressing the desktop 4.

Download Desktops v1.02 for Windows 7 from official site here.

Monday, June 25, 2012

Enable Virtualization Technology (VT) in BIOS for installing other operating system on your host OS.

Desktop virtualization software give ability to install and run multiple Operating Systems on your desktop or laptop computer in virtual environment without disturbing the host OS. You can have Windows XP, Linux OS and even Windows 95 on your latest Windows 7 laptop.
You must have a Hardware Virtualization Technology (VT) computer.
Make sure your computer support Hardware Virtualization Technology.

Virtualization Technology in BIOS

This post explains how to enable Virtualization Technology (VT) in motherboard BIOS. To run some operating systems, virtualization software and virtual machines hardware virtualization should be enabled. Mostly, operating systems which not required virtualization technology run normally when virtualization technology is enabled, but for the operating systems required this technology, it must be enabled.
All latest processors and motherboards support virtualization technology, check your motherboard vendor about this support and how to enable or disable VT in BIOS. Operating system detects the hardware virtualization technology once it’s enabled on your motherboard

Where to Find Virtualization Technology (VT) in BIOS?

This setting is found under ‘Advanced Chipset settings’ in AWARD BIOS. It will be different for each motherboard. Check your mother board manual.


How to Confirm Virtualization Technology is Enabled or Disabled?

1) If your processor is Intel, then you can use this free utility to confirm the result which operating system is sensing.
Download Intel tool to confirm virtualization technology
The result of this utility brings a screen as shown below,
Enable Virtualization Technology (VT)
2) For AMD Processors download the below utility.
3) Microsoft Tool to check hardware virtualization Technology ( VT)
Download the free tool from Microsoft here.
Installation not required, when execute the EXE file, following result appears.
Enable Virtualization Technology (VT)
The above result shown is other computer which is not having hardware enabled.
After you change the settings to disable or enable, it’s recommended to shutdown the computer for minimum 10 seconds and restart the machine (Cold Restart) to take effects. If your motherboard is latest one, it detects this change doe’s cold restart. Whenever I change this VT setting on my motherboard, it delays the next restart automatically.

source

Using VirtualBox to run Ubuntu and any other operating system


VirtualBox is a powerful x86 and AMD64/Intel64 virtualization product for enterprise as well as home use. Not only is VirtualBox an extremely feature rich, high performance product for enterprise customers, it is also the only professional solution that is freely available as Open Source Software under the terms of the GNU General Public License (GPL) version 2.

Presently, VirtualBox runs on Windows, Linux, Macintosh, and Solaris hosts and supports a large number of guest operating systems like Windows NT 4.0, 2000, XP, Server 2003, Vista, Windows 7, DOS/Windows 3.x, Linux (2.4 and 2.6), Solaris and OpenSolaris, OS/2, and OpenBSD.


VirtualBox is a cross-platform virtualization application. For example, you can run Windows and Linux on your Mac, run Windows Server 2008 on your Linux server, run Linux on your Windows PC, and so on, all alongside your existing applications. You can install and run as many virtual machines as you like -- the only practical limits are disk space and memory.
VirtualBox is deceptively simple yet also very powerful. It can run everywhere from small embedded systems or desktop class machines all the way up to datacenter deployments and even Cloud environments.

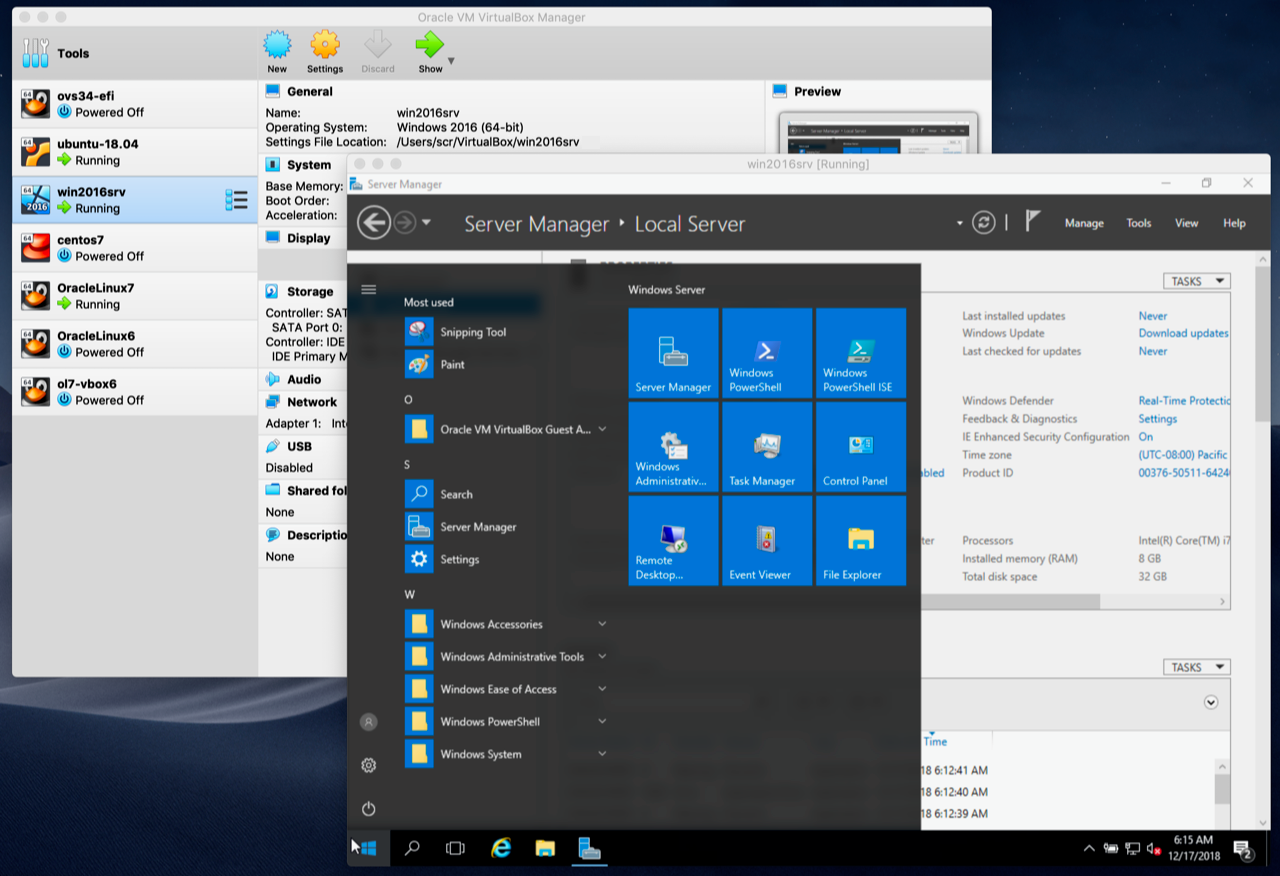
The following screenshot shows you how VirtualBox, installed on a Mac computer, is running Windows 7 in a virtual machine window:


In order to run VirtualBox on your machine, you need:
  • Reasonably powerful x86 hardware. Any recent Intel or AMD processor should do.
  • Memory. Depending on what guest operating systems you want to run, you will need at least 512 MB of RAM (but probably more, and the more the better). Basically, you will need whatever your host operating system needs to run comfortably, plus the amount that the guest operating system needs. So, if you want to run Windows XP on Windows XP, you probably won't enjoy the experience much with less than 1 GB of RAM. If you want to try out Windows Vista in a guest, it will refuse to install if it is given less than 512 MB RAM, so you'll need that for the guest alone, plus the memory your operating system normally needs.
  • Hard disk space. While VirtualBox itself is very lean (a typical installation will only need about 30 MB of hard disk space), the virtual machines will require fairly huge files on disk to represent their own hard disk storage. So, to install Windows XP, for example, you will need a file that will easily grow to several GB in size.
  • A supported host operating system. Presently, we support Windows (XP and later), many Linux distributions, Mac OS X, Solaris and OpenSolaris.
  • A supported guest operating system. 
For Further assistance: 

Microsoft® Windows® Malicious Software Removal Tool


This tool checks your computer for infection by specific, prevalent malicious software (including Blaster, Sasser, and Mydoom) and helps to remove the infection if it is found. Microsoft will release an updated version of this tool on the second Tuesday of each month.

Sunday, June 24, 2012

A Smarter Way to Make Your simple TV into a smart TV by using Amkette EvoTv


Amkette EvoTV is a digital media device which allows users to access content like videos, games and websites using WiFi and broadband connection. It comes with a remote that acts like a mouse and has a mic to facilitate conversations on VoIP (like Skype).


The remote controller of the device was something which gives you an splendid experience with its amazing features. Just like a normal remote controllers it has all the basic features such as volume control, navigation, home button, back button etc. Other than the basic features it has a in built microphone for video calling, accelerometer to play games, the navigation pad is touch sensitive as in the Appple iPod so that you can scroll clockwise or anticlockwise to zoom in or zoom out images or webpages and you can also configure the Evo TV remote controller to act as universal remote for two more devices of your choice. By just moving the controller with the help of your wrist you can navigate through the interface and it has button on the back for selection

The EVO TV is an Android based smart box which runs on the Android’s Gingerbread operating system. Amkette has customized the user interface to make it very interactive and easy to use. The smart box is powered by ARM Cortex A9 processor with ARM Mali 400 GPU. It has an inbulit memory of 4GB which can be expanded via the SD card slot. For connectivity it has 4 USB ports, HDMI, DLNA, WiFi, 1 SD/MMC card slot. It also supports 3G dongle. The Evo TV is capable of running almost all the major file formats so as to prevent you from the hassle of converting videos to make them compatible with you television. It supports upto 1080p full HD to give you a seamless multimedia experience. You can also connect the device with a Webcam, wireless keyboard and hard disk drives.
Like any other android device you can access the Google Play store on the Evo Tv to download apps. For web surfing it has the android stock browser. It also supports social networking with one touch access to Twitter, Facebook and LinkedIn.

The price of this device is Rs. 10000/- (Ten thousand only)

Friday, June 22, 2012

Rocket Dock application launcher


RocketDock is a smoothly animated, alpha blended application launcher. It provides a nice clean interface to drop shortcuts on for easy access and organization. With each item completely customizable there is no end to what you can add and launch from the dock.

Now with added Taskbar support your minimized windows can appear as icons on the dock. This allows for better productivity and accessibility.

 Features:
  • Minimize windows to the dock
  • Real-time window previews in Vista
  • Running application indicators
  • Simple drag-n-drop interface
  • Multi-monitor support
  • Supports alpha-blended PNG and ICO icons
  • Icons zoom and transition smoothly
  • Auto-hide and Popup on mouse over
  • Positioning and layering options
  • Fully customizable
  • Completely Portable
  • ObjectDock Docklet support
  • Compatible with MobyDock, ObjectDock, RK Launcher, and Y'z Dock skins
  • Runs great on slower computers
  • Unicode compliant
  • Supports many languages and can easily be translated
  • A friendly user base :)
  • And best of all... its FREE!!!

Installation:
1.Instal Rocket dock
2.Open C:\Program Files\RocketDock\Icons and paste all content of Icon Pack in there
3.Now u have 3148 icons in Rocket dock libary
4.Open Rocket Dock setings:
5.Under General mark Run at Startup
6.Under Behavior mark AutoHide
7.Done

Download Rocket Dock

Thursday, June 21, 2012

Defragmentating your hard drive

Most defrag tools only allow you to defrag an entire drive. Defraggler lets you specify one or more files, folders, or the whole drive to defragment.
A very much effective and efficient tool as compared to windows built-in defragmentation program.
 The official link is
 http://www.piriform.com/defraggler/download.

Some useful Disk Utilities

 HDD Regenerator - Repair bad sectors
Repairs most bad sectors by remagnetizing the disk surface without losing your data. Works independantly of the file system, making it compatible with all PCs, operating systems and hard drives. This software also comes bundled with Hiren's bootable Cd.
http://www.dposoft.net/

Active@Partition Recovery
Recovers most deleted, lost or formatted partitions.
http://www.partition-recovery.com/

Partition Magic
Fast and easy partitioning, Supports all Windows and most Linux file systems. Great for ignoring bad sectors and for advanced partitioning schemes.
www.partitionmagic.com

Ranish
GPL/Freeware partitioning program for use with Windows, Linux, FreeBSD and more. Not much on eye candy, but it works. .
www.ranish.com

gParted
GPL/Freeware partitioning program for use with Windows and Linux. Nice, intuitive interface and comes available as a bootable CD image..
http://gparted.sourceforge.net/

Acronis Partition Expert

Easy to use interface. Supports Windows and Linux partitions.
http://acronis.com/products/partitionexpert/

HD Tune
HD Tune is a hard disk utility with many functions. It can be used to measure the drive's performance, scan for errors, check the health status (S.M.A.R.T.), securely erase all data and much more.http://www.hdtune.com/

Most of this tools come bundled with hiren's bootable cd

Drive Diagnostic Utilities

Every major drive manufacturer have their drive diagnostic utilities. These utilities will allow you to test & diagnose your drive. Some utilities also allow you to "low-level" format (write zeros) or enable/disable certain features on your drive.


Hitachi / IBM - DFT "Drive Fitness Test"
Works with all manufacturers

Western Digital "Data Lifeguard"
http://support.wdc.com/download/index.asp#dlgtools 
Works with WD drives only

Maxtor "Powermax"
http://files2get.com/software/soft2/dyski-twarde-(hdd)-narzedzia-firmowe/powermax.exe
Works with all manufacturers

Fujitsu "FJDT"
http://www.softpedia.com/get/System/Hard-Disk-Utils/Fujitsu-Diagnostic.shtml 
Works with fujitsu models only . See also Tosibha link

Samsung "hutil"
Now that the sale of HDD division of Samsung Electronics to Seagate Technology Plc("Seagate") has been finalized, Seagate will provide all customer support including the warranty service of Samsung HDD..

Seagate "Seatools"
http://www.seagate.com/support/seatools
Works with Seagate drives only

Toshiba 
http://storage.toshiba.com/storage-services-support/warranty-support/software-utilities
This diagnostic tool is available for use by customers who feel their Fujitsu Branded Toshiba hard drive may not be operating normally. It is only designed for use with Fujitsu Branded Toshiba ATA/IDE hard drives. 

Monday, June 18, 2012

Testing your laptop fans

If you need a tool that can change your computer's fan speeds, read the temperatures of your motherboard and your hard disk, read voltages and fan speeds and check the status of your hard disk using S.M.A.R.T. or SCSI attributes, then  SpeedFan is the software to go. Check for link below:

How to Test Power Supply

Power supply is failing to be the cause of spontaneous reboots or some serious error message.

How to do a  power supply test may be an important step that must be done.

There are two ways to test the power supply, namely through manual testing using a multimeter and testing through a power supply tester.  Both ways are equally effective for power supply testing, and definitive choice is yours.

Here’s more information that can help you choose which method is best from both methods mentioned above in the test power supply.

Power Supply Testing with a Multimeter


Advantages

To test the power supply is only needed a Multimeter with a screwdriver. Disconnect the power supply your computer from computer case, then read the instructions on the side of the power supply box for a list of values in each color of cable voltage, which are physically the cables’ ends on DC power supply connector.

Attach your power supply back into the computer case, turn on your computer, then you can perform measurements only on the integrated DC voltage power supply at the top where the connector mounted on the main board.

Disadvantages

Power supply testing manually can be dangerous if you are not very cautious and will take a bit of work to be able to really test your power supply.

Caution: Do not open and / or touching the inside of the power supply box will be very dangerous.

Power Supply Testing with a Power Supply Tester


Advantages

The result of test power supply using a power supply tester can be conducted with ease and gives results that are more rigorous and conclusive, With ways that can disappear into factor of human error and negligence. So testing using a power supply tester become more secure and remove the fear and avoid electrical shock AC.

How to find drivers for Unknown Devices

Unknown Device Identifier

Unknown Device Identifier enables you to identify the yellow question mark labeled Unknown Devices in Device Manager and reports you with a detailed summary for the manufacturer name, OEM name, device type, device model and even the exact name of the unknown devices. With the collected information, you can contact your hardware manufacturer for support or search the Internet for the corresponding driver with just a simple click.

Download Unknown Device Identifier Now | 849 KB

Sunday, June 17, 2012

Connect Two Computers using a Crossover Cable

 Connect two computers together without going through a wireless network?
You can network two computers and then share files and folders, by using a crossover cable.

Step 1 Configure IP Addresses

Usually, if you are using a crossover cable to connect two computers, the computers are not connected to a LAN network. In this case, you will need to configure static IP addresses for each computer.

You have to make sure that both computers have IP addresses that are on the same subnet. For example, if you give one computer an IP address of 192.168.0.1, then you should give the second computer an IP of 192.168.0.2.

If you used the above IP addresses, you should use a subnet mask of 255.255.255.0. If you use an incorrect subnet mask, the connection will not work.

Lastly, the value for the default gateway should be the same on both machines. You can pick which IP address you want to use, but use it on both computers for the default gateway. Below is how my setup looks for one computer:


Step 2 Crossover Cable

The second thing you need to verify is that you actually have a proper crossover cable. Basically, there are a few different types of crossover cables, but it's best to get the standard crossover cable where the green and orange pairs are swapped and the brown and blue pairs stay in the same position.


The only pins that need to be crossed are 1,3 and 2,6. So just check your cable on both end and make sure it matches the diagram.

Step 3 Local User Accounts

If you are having problems accessing files both ways, you may have to create a user account on each computer that has the same name and same password. This helps get past any kind of Access is Denied errors that may pop up.

Make sure the accounts are administrator accounts also! It's best to create a new account rather than rename a current account.

Step 4 Disable Firewalls


Finally, you should disable the firewall on both computers to ensure that none of the file sharing ports are being blocked. You can do this by going to Control Panel and then Windows Firewall. Click on Off.

Saturday, June 16, 2012

System Restore Tool Displays a Blank Calendar in Windows XP

When you run the System Restore tool on a Windows XP-based computer, the calendar on the left side of the "Choose a Restore Point" window is not displayed.

This behavior can occur if the file association for Hypertext Markup Language (HTML) component (.htc) files is not in the registry.

To resolve this behavior, verify that the following keys are in the registry. If one of the registry keys is not present, create the key, and then add the values that belong to the corresponding key:
HKEY_CLASSES_ROOT\.htc
Value name: Content Type
Value data: text/x-component

HKEY_LOCAL_MACHINE\Software\Classes\.htc
Value name: Content Type
Value data: text/x-component

HKEY_CLASSES_ROOT\MIME\Database\Content Type\text/x-component
Value name: CLSID
Value data: {3050f4f8-98b5-11cf-bb82-00aa00bdce0b}

Create a second entry with the following values:
Value name: Extension
Value data: .htc

HKEY_CLASSES_ROOT\CLSID\{3050f4f8-98b5-11cf-bb82-00aa00bdce0b}
Value name ="Microsoft Html Component"

HKEY_CLASSES_ROOT\CLSID\{3050f4f8-98b5-11cf-bb82-00aa00bdce0b}\InProcServer32
Value name: Default
Value data: "C:\Windows\System32\Mshtml.dll"

Create a second entry with the following values:
Value name: "ThreadingModel"
Value data: "Apartment"
NOTE: This procedure assumes that Windows XP is installed in the C:\Windows folder. Make sure to change C:\Windows to the appropriate <windows_folder> if Windows XP is installed in a different location.

To merge all of the information at one time, you can copy and paste the following text into a text editor, such as Notepad, and then save it as a .reg file.

Windows Registry Editor Version 5.00

   [HKEY_CLASSES_ROOT\.htc]
   "Content Type"="text/x-component"
   @="htcfile"

   [HKEY_CLASSES_ROOT\MIME\Database\Content Type\text/x-component]
   "CLSID"="{3050f4f8-98b5-11cf-bb82-00aa00bdce0b}"
   "Extension"=".htc"

   [HKEY_CLASSES_ROOT\CLSID\{3050f4f8-98b5-11cf-bb82-00aa00bdce0b}]
   @="Microsoft Html Component"
   [HKEY_CLASSES_ROOT\CLSID\{3050f4f8-98b5-11cf-bb82-00aa00bdce0b}\InProcServer32]
   @="C:\\WINDOWS\\System32\\mshtml.dll"
   "ThreadingModel"="Apartment""

   [HKEY_LOCAL_MACHINE\SOFTWARE\Classes\.htc]
   "Content Type"="text/x-component"
   @="htcfile"


Source

Friday, June 15, 2012

Panda USB Vaccine - Antimalware and Vaccine for USB devices

Panda USB Vaccine will help prevent malware from spreading from usb to pc
There is an increasing amount of malware which, like the dangerous Conficker worm, spreads via removable devices and drives such as memory sticks, MP3 players, digital cameras, etc.
Panda USB Vaccine is a free solution designed to protect against this threat. It offers a double layer of preventive protection, allowing users to disable the AutoRun feature on computers as well as on USB drives and other devices
http://www.pandasecurity.com/homeusers/downloads/usbvaccine/

Thursday, June 14, 2012

Troubleshoot a Printer Spooler Missing Error

Instructions
  1. Click the "Start" button and choose "Control Panel" from the list. Double-click the "Administrative Tools" icon. If that icon is not visible, click the "Classic View" option to display the full list of control panel icons.
  2. Double-click the "Administrative Tools" icon, then double-click the "Services" icon. Scroll down to the "Print Spooler" service, and double-click it.
  3. Use the drop-down box next to "Startup Type" to change the startup option to Automatic. Changing the service to automatic ensures that it will start each time the computer is restarted, and will remain running until it is manually stopped.
  4. Right-click the "Print Spooler" service and choose "Start" to start the service manually. You can also simply reboot your computer and allow the service to start up automatically.
  5. Send a print job to the printer and wait for it to print. If the job does not print, or if you get an error message, go back to the print spooler service and make sure it is running.

Other shortcut to open services.msc is:
Press windows+r keys .
on run type:  services.msc and press enter
Scroll down to "Print Spooler" services
Chane the startup option to Automatic
Click on Start and Apply

Wednesday, June 13, 2012

Install Windows xp in less than 20 minutes

Now, this tip will be very helpful for those who frequently install windows xp operating system. Normally OS installation takes around 40 minutes to complete, but through this trick you can now save 10-15 minutes. This simple tricks goes this way.

1. Boot through Windows XP CD.

2. After all the files are completely loaded, you get the option to select the partition. Select �c�.

3. Now Format the partition, whether it is normal or quick with NTFS or FAT

4. Once the formatting is completed, All the setup files required for installation are copied. Restart your system by pressing Enter.

Now, here begins the Simple trick to save 10-15 minutes.

5. After rebooting, you get a screen where it takes 40 minutes to complete or finalize the OS installation.

6. Now, Press SHIFT + F10 Key -> This opens command prompt.

7. Enter �Taskmgr� at the command prompt window. This will open Task Manager.

8. Click the Process Tab, here we find a process called Setup.exe -> Right Click on Setup.exe -> Set Priority -> Select High or Above Normal. Initially it will be Normal.

Thats it, no more work to do. Relax your self and see how fast the installation process completes

Tuesday, June 12, 2012

Windows Safe Mode Fixer

SMFixer is a handy and reliable utility designed to fix Windows Safe Mode issues.

Many viruses corrupt Windows Safe Mode so you cannot boot in safe mode to remove them. This handy tool repairs Windows Safe Mode and gives you back the full control over your computer.

How to use it? Click FIX button and your computer will restart immediately. Please save any unsaved work before you click FIX button. After restart hit F8 key to boot in Safe Mode.

Recommended Power Supply Wattage Calculator

With ASUS Support

This power supply wattage calculator aims to provide a general idea for the selection of power supply unit based on the system configuration with all added-on devices and components. The recommended power wattage figure is calculated based on the peak or maximum utilization power consumption of installed devices or components. Please ensure to use power supply unit capable of outputting over the calculated recommended wattage to prevent system instability, random reset, unexpected shutdown, or similar problems caused due to insufficient power.

http://support.asus.com/PowerSupply.aspx?SLanguage=en


eXtreme Power Supply Calculator Lite v2.5

The eXtreme Power Supply Calculator contains 1050+ CPUs including latest processors from Intel and AMD, latest graphics cards from NVIDIA and AMD (ATI) and more!

The recommended total Power Supply Wattage gives you a general idea on what to look for BUT it is NOT a crucial factor in power supply selection! Total Amperage Available on the +12V Rail(s) is the most important, followed by the +5V amperage and then the +3.3V amperage.

eXtreme Power Supply Calculator Pro version contains Amperage per +12V, +5V and +3.3V power supply rails, recommended UPS rating, multiple video cards and more.

http://extreme.outervision.com/psucalculatorlite.jsp

Monday, June 11, 2012

Folder password protect software.


Lets say you share computer between members of your family, but you still want to have some private files on it. Or you just dont want that accidental person (if your pc goes to repair) find some secret files on your PC. There is a lot of software that can encrypt/decrypt your secret files but it can take a lot of time if you have many such files. Our solution lets you have separate disk on your PC which may be locked and unlocked with a password within one second! Moreover, when locked the disk becomes completely invisible in the Windows system.

How it works?
Just install Secret Disk and choose a password. Then, start Secret Disk. Click unlock button, enter your password and you will see one more disk X: appears in My Computer area. You can now start working with your private files to save them to secret disk X. When you need protection just click icon in the tray area to lock secret disk and it will disappear within one second with all contents! When you want your files back, just open Secret Disk program, press Unlock button and enter your password. Its easy!

Power failure
In case of power failure or Windows failure secret disk will be locked on next system boot. It happens automatically because secret disk information are kept in memory and if memory fails secret disk will not be restored on next system logon. This adds maximum protection for your files located on the disk.

100% Compatible
Secret disk compatible with any files and folders. You can work with it as usual, like your My Documents folder.

Security level
Secret Disk does not encrypt any files. Secret Disk only limit access to secret location with your files and ties virtual disk to it when needed. This will provide you enough security to hide your files from accident person taking control over your PC, but doesn't guarantee top level security (because files stored on your disk 'as is', without encryption).

Download SecretDisk

if you do no like that software  u can try this alternate program

Sunday, June 10, 2012

Freeware create and print your own CD covers

Create and print your own CD covers CdCoverCreator enables you to create and print your own CD covers for Audio and Data CDs. You can create your covers, inlays, labels, and even booklets. The program can download the original cover art from the Internet for many CDs, or you can design your own covers from scratch. CdCoverCreator can gather track names and artist information via CDDB and automatically populate the cover details with song titles, track length etc. Easy to use and produces great results.              

Download cdcovercreator

Freeware JPEG to PDF

Convert most image types to PDF documents JPEG to PDF enables you to convert JPG and other popular image formats to PDF files. You can choose one or more images and either combine them into a single PDF file or output multiple PDF documents - one for each image. The program can automatically size your images to fit within the page size. You can also add custom margins for better presentation and customize the page size settings. In addition to JPG/JPEG, the program also supports BMP, GIF, PNG, TIF, WMF and EMF files. Easy to use, no installation.

Download Jpeg To Pdf

Friday, June 8, 2012

Wi-Fi Hotspot Have an Evil Twin

You may want to think twice before logging into a public wireless hotspot. Sure, grabbing a few minutes of connectivity is convenient, but identity thieves are discovering that, through "evil twin" attacks, hotspots are a great way to steal unsuspecting users' private information.
So how does an evil twin attack work? Let's say that I'm a hacker. I set up my computer to transmit a signal that turns my PC into an access point, or Wi-Fi hotspot. I'll even give it a legitimate-sounding name, like T-Mobile Hotspot, to fool unsuspecting surfers.
Next, I put my laptop in a backpack and read a newspaper while sipping some java at the local coffee shop. All I have to do is wait for you to connect. (And if I'm looking to steal from you, I'll require you to enter a credit card number to get access, just like T-Mobile does--then I'll have your credit card information.) While you surf the Web, my computer redirects you to Web pages I have created that happen to look like the ones you visit on a daily basis.
In fact, the only difference between the Citibank page you visit every day and the one I have made is that my page is unencrypted. I can log all of the information you input into various Web forms, and when you check your e-mail, I can read it along with you.


Don't Let Your Browser Make You Feel Safe


There are several measures already in place by most Web browsers to warn about unencrypted Web pages. However, he says, each of them has various security flaws.

Pop-Up Warnings: Web browsers often use a pop-up dialog box to indicate that information being sent is not encrypted. The problem with this is that these boxes offer the option to "never show this again." If you have clicked this box just once, you will no longer be warned if you are sending information through unencrypted channels.

The Lock Icon: Most Web browsers display a small lock icon to indicate an officially regulated, encrypted Web page. The problem with these, is that you must be diligent about looking for them every time you log on to a new page. Additionally, if a hacker changes even one letter in the domain name you are familiar with (an example  replacing the lowercase L in lehman.com with a one, 1ehman.com), they can then register that domain name. When you are redirected to that page it will display the lock icon, and you may never notice the changed domain name. Why would an illegitimate site be able to display this lock icon? Because, the public certifying authority that gives out digital signatures to legitimate sites can be fooled into giving digital signatures to illegitimate sites.

HTTPS and Unfamiliar Links:  Most banks advertise the unencrypted version of their Web pages (https indicates a secure version; http, however, is easier to remember). When you log on to that page and click to enter the encrypted version, you can be redirected to a page with a domain name that is unrelated to the bank's home page. If you do not recognize the name, it is difficult to know if you have been redirected to a page operated by the bank or by a hacker.

How to Protect Yourself


If you are diligent, these tips will make you less likely to fall victim to an attack.

Check Your Wi-Fi Settings: Many laptops are set to constantly search and log on to the nearest hotspot. While this option might seem convenient, it does not allow you to monitor which hotspots you are logging on to and determine if they are legitimate. Turning off this option will prevent your computer from logging on to a hotspot without your knowledge.

Pay Attention to Dialog Boxes: Pop-up warnings are there for a reason--to protect you. If you are lucky enough to have not clicked the "never show this again" option, make sure you read these warnings carefully before agreeing to send information.

Use One of Your Credit Cards on the Web Only: Open a credit card account that is used solely for the purposes of shopping on the Web. Ideally, you should be able to access account records online so you don't have to wait for monthly statements to monitor any activity. "Be prepared to close that account on short notice if it's been compromised,"

Conduct Private Business in Private: "Maybe you don't need to move money around or check your bank statements when you are connected to a public hotspot . If you restrict your public surfing to Web pages you don't mind a stranger reading along with you, there is little an evil twin attacker can do to harm you.

Legal Help?


The House of Representatives has put language in the proposed Securely Protect Yourself Against Spyware Act, or Spy Act, to prosecute those caught wirelessly stealing your information.
But while the Spy Act now makes it possible to punish those who conduct evil twin attacks, the very nature of the problem may make it difficult to identify the culprits. Victims may never realize that the hotspot they used to surf the Web was illegitimate, and once that hotspot has been shut down, it can be impossible to find the perpetrator.
The best advice is to stay vigilant and protect yourself.

What is the need of securing Wireless Access Points

Is it a crime if I open up my laptop and use whatever open wifi network I detect to access the Internet. According to me the answer is  "Yes"

Wifi networks can be open or closed. Closed networks are secured either at the WiFi access point through the use of an encrypted Network Key or through the use of an authentication server.
At the wireless access point (WAP), closed networks can be secured with either

WiFi Protected Area (WPA) or

Wired Equivalency Point (WEP). When an individual attempts to connect with an WiFi access point, the individual must provide a network key in order to establish a connection

WPA2 is strongest; use it if you have a choice. It should protect you against most hackers.
Open networks are ones where individuals can freely establish a connection to the access point and the Internet. There is no need for a network key, password, or authentication. Many coffee houses, libraries, and other hot spots provide free access in this manner. Individuals simply need to know the SSID of the network, and generally laptops have software built in that enables the laptop to detect the SSIDs of the available networks in range
Crime
Open WAPs create the opportunity for bad people
    • to anonymously access bad stuff. 
    • to do bad things (including criminal activity, copyright infringement, distributing pornography or child pornography or launching spam.
    • to intercept transmissions over your network.
    • to hack into computers, and possibly inflect them or steal data, including the risk of identity theft.

Open wifi networks are problematic because they create an untraceable opportunity for criminals. When an individual visits a website on the Internet, that website generally records the IP address number of the individual. If the individual is doing something illegal, then that activity can be traced back to that IP number. If the police can trace the IP number to an individual subscriber, they can attempt to arrest the individual. When an individual gains Internet access using an open wifi network at a coffee house, then the IP number of that coffee house is recorded in the server log and investigators are unable to tell which person at the coffee house it was that visited that site. Likewise, if the individual gains Internet access through an open network in residential neighborhood, say that of the Shyam', then the police will trace the IP number back on the Shyam' and come knocking at the Shyam' door .
Other WiFi Security Issues
IP Number Liability
  • Your computer on the Internet has an Internet address, an IP number. Everything that is done on your computer leaves that IP number like a bread crumb trail across the Internet. If you visit a site, you IP number is left in the server log, and anyone looking at that log can see that IP number. That IP number belongs to a block of IP numbers assigned to your ISP. In order to trace that IP number back to you, the  ISPs for the subscriber information associated with that IP number. What is provided by the ISP is the name of the individual who subscribed to the ISP; not necessarily the person who visited that Internet site. In the case of home Internet accounts that have open WiFi access points attached to them, the person who visited the site in question can be anyone who wandered in range of the WiFi signal and piggy backed on the account. Even those who have secured Internet access at home, the person who visited the site in question could be any friend, guest, or relative that happened to visit that house and used that computer.
Network Security
  • Open wifi networks also create an open door to computers on your network. Depending on the configuration of your computers and your access point, hackers can get access, steal information and upload malicious software.
Eavesdropping
  • Data sent between computers over WiFi is out in the open and can be intercepted by anyone within range. Data sent between computers using security will be encrypted and if intercepted is difficult to read (WiFi encryption has reportedly been cracked, but still creates a substantial barrier to reading intercepted traffic). Transmissions over open WiFi access points is not encrypted and is easy to read.
Acceptable Use Policies
  • The AUP that a subscriber has with its Internet access provider may (or may not) prohibit sharing of Internet access outside the household (or whomever the AUP restricts it to. If you have an open WiFi access point, you may be in breach of contract. Note that there have been Internet access providers that actively support sharing of access, and will even set up a billing system to enable you to do it for a fee. Also, if your a coffee house and you want to share as a loss-leader, you may be able to acquire a hirer tiered service (one that assumes greater bandwidth consumption) that permits sharing.

Securing Wireless Access Points

Wireless Internet access can offer convenience and mobility. But there are steps you should take to protect your wireless network and the computers on it.
  • Use encryption to scramble communications over the network. If you have a choice, Wi-Fi Protected Access (WPA) is stronger than Wired Equivalent Privacy (WEP).
  • Use anti-virus and anti-spyware software, and a firewall.
  • Most wireless routers have a mechanism called identifier broadcasting. Turn it off so your computer won't send a signal to any device in the vicinity announcing its presence.
  • Change the identifier on your router from the default so a hacker can't use the manufacturer's default identifier to try to access your network.
  • Change your router's pre-set password for administration to something only you know. The longer the password, the tougher it is to crack.
  • Allow only specific computers to access your wireless network.
  • Turn off your wireless network when you know you won't use it.
  • Don't assume that public "hot spots" are secure. You may want to assume that other people can access any information you see or send over a public wireless network.
  • Change your network password regularly

Make the Caps Lock Key Beep to Alert You When Accidentally Hit

In Vista & Windows 71. To make the Caps Lock key beep and alert you if it’s accidentally hit in Vista or Windows 7, click on Start >> Control Panel.

2. In Control Panel , click Ease of Access Center.

3. When the Make your computer easier to use screen comes up, you might be surprised when the computer starts talking to you. If you want to turn that off, uncheck Always read this section aloud.
Then under the Explore all settings list click Make the keyboard easier to use.

4. Then in the next screen scroll down and check Turn on Toggle Keys – hear a tone when you press CAPS LOCK, NUM LOCK, or SCROLL LOCK. Then click OK and close out of Control Panel.

In Windows XP

1. The process is essentially the same in XP but things are named and laid out differently. Click on Start >> Control Panel.

2. When Control Panel opens make sure you’re in Classic View and click on Accessibility Options.

3. In the Accessibility Options window, make sure you’re under the Keyboard tab, then check Use ToggleKeys. Click OK then close out of Control Panel.

That’s it! Now any time you hit the Caps Lock key you will hear it beep. This trick can be very helpful when you’re busy and accidentally hit Caps Lock.

How To Convert Movies For iPhone or iPod Touch In Windows 7

In this article I will give you a step by step guide for a tool called Handbrake.

NOTE: The iPhone can only play movies that are encoded using MPEG-4 and H.264 codecs and have the extensions '.mp4' or '.m4v'. In this tutorial I will show you how to convert movies that are in other formats (for example, wmv, avi, mkv, etc.) to iPhone playable movies.

How To Use HandBrake To Convert Movies To The iPhone Format
HandBrake is an freeware application that can convert movies from any DVD-like source such as: VIDEO_TS folders, DVD images, real DVDs, .VOB and .TS files and any other multimedia formats. It can convert them to MP4, MKV, AVI or OGM using the MPEG-4, H.264, Theora video codecs and the following audio codecs: AAC, MP3, Vorbis or AC-3.
You can download the application from Handbrake.fr. Download the latest version for Windows 7 (select the GUI download link) and install it. Now launch Handbrake and let's see how we can convert a typical .avi movie into a playable iPhone one.
When you launch Handbrake, click on the 'Source' button from the menu bar, to select the movie that you want to convert. As you can see, you have two choices: a video file or an DVD/VIDEO_TS folder. Choose what you prefer and then browse to the desired video file.

Now click on the Browse button and choose a destination folder for the new video and type its file name.

Next, select the output settings for the video file. This can be done from the presets panel on the right. Simply click on the 'iPhone & iPod Touch' option and all the output settings will be set in automatically. Also, if you will use this application only for this task, you can click on the 'Set Default' button at the end of the panel and make the 'iPhone & iPod Touch' preset the default one.

Finally, click the Start button, found near Source. Handbrake will begin the encoding process and a command window will open with details about the process.

When the process ends the window disappears.  The codec used for the encoding process was H.264 which is the best for image quality.

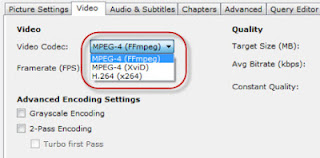
If you want a smaller file and fewer minutes for the encoding process you can select a different codec, like MPEG-4 XviD or MPEG-4 FFmpeg, from the Video tab.

For example, the MPEG-4 FFmpeg codec made from the original file a new video that had only 38.7MB in 2 minutes. Unfortunately the image quality was quite poor.

MPEG-4 XviD codec would seem to be the 'compromise' solution. Unfortunately it isn't. The encoding time is 3 minutes long and the file size 39,7MB, but the image quality is very similar to the MPEG-4 FFmpeg codec.

The last step is to connect your iPhone to the PC, start iTunes or other alternatives and upload the movie.

source

Wednesday, June 6, 2012

Pen Drive or Memory Card or iPod showing write protection error

Problem in copying files on their USB portable devices like pen drives, memory card and iPod etc.


The error can be of following types:

  • Cannot copy files and folders, drive is write protected
  • Cannot format the drive, drive is write protected
  • The disk is write protected
  • Remove write protection or use another disk
  • Media is write protected

How to Fix:
Write Protection on any portable USB Device can be applied by the physical lock provided on the card adjuster or some times provided on the pen drives, so make sure to make your drive not write protected by moving the lock in right direction.
But even after moving the physical lock for write protection the problem can happen due to some virus action. This happens when some virus or script which applies the registry hack to make any drive write protect when connected to the computer, In that case follow the procedure below to remove write protection from your pen drive.
1. Open Start Menu >> Run, type regedit and press Enter, this will open the registry editor.
2. Navigate to the following path:
Quote
HKEY_LOCAL_MACHINE\SYSTEM\CurrentControlSet\Control\StorageDevicePolicies


3. Double click the key WriteProtect in the right pane and set the value to 0 in the Value Data Box and press OK button

4. Exit Registry, restart your computer and then again re-connect your USB pen drive on your computer. That is it, done.

source

Tuesday, June 5, 2012

Disable Windows Xp Services if not needed

There are a lot of services running on your computer that you probably never knew existed.  Depending  how and what you use your  PC for may allow you to disable some of them and therefore improve the computers performance.  Read carefully through this list before deciding what you do not need before disabling any of them.

Here is a alphabetical list of Unneeded Windows services that you can turn off to speed up your slow computer:

* AdobeLM Service: Not all computers have this service, still it is useless. Just disable it if you have it running on your machine.
* Alerter: Disable this one if you are not on a network because you will not receive alerts.
* Application Layer Gateway Service: Unless you want to share your Internet connection, turn this off as this service provides support for 3rd party protocol plug-ins for Internet Connection Sharing
* Application Management: Set this to manual.
* Automatic Updates: Disable it if you do not require auto-updating and patching of Windows. It is pretty useless if you use auto-patcher by NeoWin to update your Windows OS. Thus, you will save bandwidth.
* Background Intelligent Transfer Service: Disable this if you do not need Automatic Update as well. This is also a potential security threat as it uses idle network bandwidth to transfer data.
* ClipBook: Disable this if you are not on a network, since you do not need to share anything.
* Computer Browser: Disable this too if you are not on a network, as you do not need to browse and monitor connected computers.
* Error Reporting Service: Disable this service for reporting errors to Microsoft, because they will hardly even reply to you for any error you get. This also saves a lot of bandwidth.
* Fast User Switching Compatibility: Disable it if you have only a single user on your computer, or if you do not use fast user switching feature much. That is, if you completely log off and then allow other users to use your computer, then you do not need this. Note that this service is completely useless for low memory computers.
* FTP Publishing: Disable this if you do not use FTP.
* Help and Support: Set it to manual or turn it off if you do not use the help feature often. You can turn it on again at any time if you need help.
* IMAPI CD-Burning COM Service: Set this to manual to save memory and time. Do not turn it off if you have a CD writer or a DVD writer attached to your computer.
* Indexing Service: Turn it off, as this uses a lot of CPU. If you are an avid searcher, like a maniac, on your computer, leave it on since it will help you. If you know where your files are and do not use search that often, then disable it for your good.
* Windows Messenger: Disable this if you are not on a network, it uses too much memory and it is a hog. Also, this is a likely security threat.
* Net Logon: Disable this if you are not on a network.
* NVIDIA Display Driver Service: If you do not use the features of NVIDIA Desktop, this service must be disabled; it is a big hog of memory.
* Office Source Engine: Disable it if you have a MS Office CD handy always, its helpful if your installation goes corrupt.
* Print Spooler: Disable it if you do not have a printer connected to your computer.
* Remote Registry: Serious security threat if turned on, disable it no matter what.
* Removable Storage: Disable it if you do not use removable storage drives, else turn it to manual.
* Security Center: Damn useless and irritating feature. Disable it.
* Uninterrupted Power Supply: Disable it if you don�t have a UPS attached to the serial port of your computer.
* Windows Image Acquisition (WIA): If you do not connect / use a camera or scanner with your computer, disable this service, else set it to manual.
* Windows Media Connect: Disable this if you do not use things such as an iPod, etc... for your Windows Media Player.
* Windows Media Connect (WMC) Helper: Disable this if you disabled the one above or if you do not need help from Microsoft.

Monday, June 4, 2012

64-bit Vs 32-bit

Despite the fact that Widows XP had a 64 bit version it was not been so reliable to the user for it's instability. Later Microsoft released Vista 64-bit version. But this time Vista was having a few problems with its usability.

Windows 7 with 64-bit version seems to be more equipped and people are really eager to give it a try. But the 64-bit operating system only runs in supportable hardware. It is highly recommended that you should have latest hardware configuration to use 64-bit Windows 7. It does give you better scope to utilise your computer usage.

To elaborate the fact clearly, you should know the following things!

  • What does differ 64-bit from 32-bit?
Generally we can say that 64-bit system handles the big amount of physical memory (RAM ) more effectively than the 32-bit. The 64-bit system provides a larger space for your computing. Logically 64-bit system has the capabilities of utilising a huge amount of RAM. But, Windows 7 can support up to 192 GB of physical memory, where the Windows 7 32-bit is only capable to use 3 GB RAM. That means if you install RAM more than 3 GB, it does not works in 32-bit system and the the rest of the RAM just goes wasted.In the case of 64-bit system, as it handles a huge amount of physical memory length, the time of swapping the processes in the RAM is minimised. Which means that your 64-bit Windows 7 performs faster than its 32-bit version.

Kernel Patch Protection is another feature of 64-bit version which adds a better security in Windows. It prevents the malicious programs from updating or patching the Windows 7 kernel. That means any third party tool can not modify the kernel services. This feature is not available in the 32-bit version of Windows 7. Where security is a mandatory requirement for the system, 64-bit version of Windows 7 is more preferable.

  • Is Windows 7 64-bit version better in performance comparing to 32-bit?
As I stated earlier that the 64-bit version utilises an enormous amount of RAM, obviously it performs faster than the 32-bit counterpart. You can run a number of complex applications simultaneously without any inconvenience.

  • 32-bit applications are ready to run in a 64-bit OS .
Basically the 64-bit windows 7 operating system supports all the 32-bit applications. But all the 32-bit applications you generally use are not optimized for a 64-bit processor. Therefore, you may go disappointed with some 32-bit application in the 64-bit system.

In the other hand the 32-bit version Windows does not support 64-bit applications at all. The 64-bit applications require a well equipped system and latest hardware configuration.

  • How can you find if your system is of 64-bit architecture?
Go to Control Panel\System and Security\System from the control panel. You can see the following window where you can discover your system version.


Eventually, if you are running the 64-bit Windows 7 in your computer then you can see two folders in the Program files location. 1. Program files 2. Program Files (x86). All the programs that are compatible with 32-bit will go to the later one.

  • Can you upgrade your 32-bit Windows 7 to 64-bit?
No, you can not.  If your hardware manufactured with the 64-bit architecture support then you are able to install freshly a 64-bit Windows 7.

Still now majority of the applications have not the capability of taking the advantages of 64-bit architecture. Meanwhile as Windows 7 is settling in the mainstream, it is quite obvious that majority of applications will turn to 64-bit version. You can expect more people to use this version of Windows 7.

 A few editions of 64-bit Windows 7 provide a Windows XP Mode that solves some backward-compatibility problems, but it isn't a universal solution .

  • Can I use a 32-bit device driver under 64-bit Windows 7?
No. A device driver is privileged code that runs in the same address space as the Windows kernel.  However, while 32-bit drivers are not directly supported in 64-bit Windows 7, 64-bit Windows 7 users can install 32-bit drivers in Windows XP Mode and use USB-based printers and other USB-based legacy devices with the Windows XP virtual machine.

  • What exactly is Windows XP Mode, and how do I get it?
The simple answer is that Windows XP Mode is a virtual machine containing Windows XP SP3 that runs under Windows Virtual PC 7. It is available as a free download to users of Windows 7 Professional, Ultimate, and Enterprise editions.

Courtesy: http://www.infoworld.com