Thursday, July 5, 2012

Reasons for moving your My Documents folder

There are two serious reasons to do this with immediate effect.
  1. Imagine that all your precious documents, photos and sundry other files are organized beautifully in this folder on the system partition (commonly the C Drive). Imagine a system crash. Imagine the loss of never able to recover that data. And now imagine a simple step which could have saved the day.
  2. The usual good word is to partition your hard disk into multiples with a minimum size kept for the system drive. With time My Documents will fatten up as more data is stashed away in it. Moving the folder to a different drive saves space and more importantly safeguards it.

How To Move My Documents Folder in Windows XP

  1. Right click on the My Documents icon on the desktop.
2.  Click on Move and choose your chosen location for the folder. Move it to a different partition. For instance, I have it on my D Drive.
3. Click Apply and then Ok. A prompt will ask whether you want to move all of the current documents to the new location or not. Choose Yes. All your documents are switched to the new location and it’s all like before except now they are safer from a system crash.


Wednesday, July 4, 2012

Troubleshooting steps for issues when you try to use the System Restore tool in Windows XP

What is System Restore?

System Restore helps you restore your computer's system files to an earlier point in time. It's a way to undo system changes to your computer without affecting your personal files, such as e‑mail, documents, or photos.
Sometimes, the installation of a program or a driver can cause an unexpected change to your computer or cause Windows to behave unpredictably. Usually, uninstalling the program or driver corrects the problem. If uninstalling does not fix the problem, you can try restoring your computer's system to an earlier date when everything worked correctly.
System Restore uses a feature called System Protection to regularly create and save restore points on your computer. These restore points contain information about registry settings and other system information that Windows uses. You can also create restore points manually.
System Restore is not intended for backing up personal files, so it cannot help you recover a personal file that has been deleted or damaged. You should regularly back up your personal files and important data using a backup program.

Troubleshooting steps for issues when you try to use the System Restore tool in Windows XP

Saturday, June 30, 2012

Winsock/Tcp repair utility

What is winsock ?

Short for Windows Socket, an API for developing Windows programs that can communicate with other machines via the TCP/IP protocol. Windows 95 andWindows NT comes with Dynamic Link Library (DLL) called winsock.dll that implements the API and acts as the glue between Windows programs and TCP/IP connections.

How to repair ?

netsh winsock reset is useful command that you can use in Microsoft Windows to reset winsock catalog back to default setting or clean state. You can try this if you are having following Internet access or networking problems but still failing to resolve the problem after trying all other suggestions.

Internet or network problem after removing the adware, spyware, virus, worm, trojan horse, etc
- Loss network connection after installing/uninstalling adware, spyware, antispam, vpn, firewall or other networking programs
- Unable to access any webpage or can only access some webpages
- Pop-up error window with network related problem description
- No network connectivity due to registry errors
- DNS lookup problem
- Fail to renew the network adapter’s IP address or other DHCP errors
- Network connectivity issue with limited or no connections message
- Other networking problems

If you are using Windows XP, here is the way you can launch command prompt after logging in as administrator.

1)Go to Start and click Run…
2)Type cmd.exe and click OK.
3) Type the following command on the command prompt:
                    netsh winsock reset

Alternately you can also download this utility to repair winsock
Download Winsock/Tcp repair utility

Friday, June 29, 2012

Svchost.exe taking 100% CPU usage ? Analyze & Fix it

Svchost Viewer is a small utility that allow users to check what all those svchost instances are all about and what services are each one of them running. In Windows 7 Task Manager you need to check Show Process From All Users to view the svchost.exe processes, be default they are hidden.

With this tool you can analyze, find more information about the service behind each svchost.exe process that is taking excessive memory or CPU, and turn it off.

Download Svchost Viewer

Thursday, June 28, 2012

What is Windows Defender Offline?

Sometimes, malicious and other potentially unwanted software, including rootkits, try to install themselves on your PC. This can happen when you connect to the Internet or install some programs from a CD, DVD, or other media. Once on your PC, this software might run immediately, or it might run at unexpected times. Windows Defender Offline can help remove such hard to find malicious and potentially unwanted programs using definitions that recognize threats. Definitions are files that provide an encyclopedia of potential software threats. Because new threats appear daily, it's important to always have the most up-to-date definitions installed in Windows Defender Offline. Armed with definition files, Windows Defender Offline can detect malicious and potentially unwanted software, and then notify you of the risks.

Windows Defender Offline system requirements


For both the PC infected with a virus or malware, and the PC that you are creating the bootable media on, you'll need PCs with the following minimum requirements.
Operating system:

Windows XP Service Pack 3
Windows Vista, Windows Vista with SP1, Windows Vista with SP2, or higher
Windows 7, Windows 7 with SP1, or higher
Windows Developer Preview, Windows 8 Consumer Preview, Windows 8 Release Preview

How to Create A System Sweeper Bootable CD,USB or ISO for a PC

1) Download the EXE file here.

2) Select the appropriate bootable medium. Once you start the creation, it will download the package and latest updates from Microsoft official site. So, make sure you have direct or proxy internet connection with download access.


3) If you select CD, then insert the blank CD in next screen, if it is an USB drive, just remember this program will format the USB drive and install System Sweeper.


ISO can be ideal to mount and use in working computer or any virtual machines.

4) Successful message will appear after the completion.

5) If it is a physical computer which can’t be booted or cleaned while OS is working, then insert the CD or USB and boot from it. Mount the ISO file to CD drive and boot the virtual machine for cleaning.

Press any key to boot from CD. It loads like latest Microsoft Operating Systems. Malware and virus clean up should start nicely.

source

Tuesday, June 26, 2012

First free Tool for Windows 7 Multiple Desktops by Microsoft

This product is better  because of Microsoft
You can create maximum 4 multiple desktops by this tool. Installation is very simple.

Once you installed the application, new icon will appear in notification area.

Right clicking this icon will bring the settings of Desktops v1.02.


The hotkeys can be setup here to switch among different desktops by keyboard shortcuts.
The original desktop will be marked as Desktop 1. Other three desktops will be created when you try to access them at first time either by using keyboard hotkeys or accessing from notification area.


The above screen shows the running three Windows 7 multiple desktops. I do not have the forth virtual desktop yet, but that can be created by pressing the desktop 4.

Download Desktops v1.02 for Windows 7 from official site here.

Monday, June 25, 2012

Enable Virtualization Technology (VT) in BIOS for installing other operating system on your host OS.

Desktop virtualization software give ability to install and run multiple Operating Systems on your desktop or laptop computer in virtual environment without disturbing the host OS. You can have Windows XP, Linux OS and even Windows 95 on your latest Windows 7 laptop.
You must have a Hardware Virtualization Technology (VT) computer.
Make sure your computer support Hardware Virtualization Technology.

Virtualization Technology in BIOS

This post explains how to enable Virtualization Technology (VT) in motherboard BIOS. To run some operating systems, virtualization software and virtual machines hardware virtualization should be enabled. Mostly, operating systems which not required virtualization technology run normally when virtualization technology is enabled, but for the operating systems required this technology, it must be enabled.
All latest processors and motherboards support virtualization technology, check your motherboard vendor about this support and how to enable or disable VT in BIOS. Operating system detects the hardware virtualization technology once it’s enabled on your motherboard

Where to Find Virtualization Technology (VT) in BIOS?

This setting is found under ‘Advanced Chipset settings’ in AWARD BIOS. It will be different for each motherboard. Check your mother board manual.


How to Confirm Virtualization Technology is Enabled or Disabled?

1) If your processor is Intel, then you can use this free utility to confirm the result which operating system is sensing.
Download Intel tool to confirm virtualization technology
The result of this utility brings a screen as shown below,
Enable Virtualization Technology (VT)
2) For AMD Processors download the below utility.
3) Microsoft Tool to check hardware virtualization Technology ( VT)
Download the free tool from Microsoft here.
Installation not required, when execute the EXE file, following result appears.
Enable Virtualization Technology (VT)
The above result shown is other computer which is not having hardware enabled.
After you change the settings to disable or enable, it’s recommended to shutdown the computer for minimum 10 seconds and restart the machine (Cold Restart) to take effects. If your motherboard is latest one, it detects this change doe’s cold restart. Whenever I change this VT setting on my motherboard, it delays the next restart automatically.

source

Using VirtualBox to run Ubuntu and any other operating system


VirtualBox is a powerful x86 and AMD64/Intel64 virtualization product for enterprise as well as home use. Not only is VirtualBox an extremely feature rich, high performance product for enterprise customers, it is also the only professional solution that is freely available as Open Source Software under the terms of the GNU General Public License (GPL) version 2.

Presently, VirtualBox runs on Windows, Linux, Macintosh, and Solaris hosts and supports a large number of guest operating systems like Windows NT 4.0, 2000, XP, Server 2003, Vista, Windows 7, DOS/Windows 3.x, Linux (2.4 and 2.6), Solaris and OpenSolaris, OS/2, and OpenBSD.


VirtualBox is a cross-platform virtualization application. For example, you can run Windows and Linux on your Mac, run Windows Server 2008 on your Linux server, run Linux on your Windows PC, and so on, all alongside your existing applications. You can install and run as many virtual machines as you like -- the only practical limits are disk space and memory.
VirtualBox is deceptively simple yet also very powerful. It can run everywhere from small embedded systems or desktop class machines all the way up to datacenter deployments and even Cloud environments.

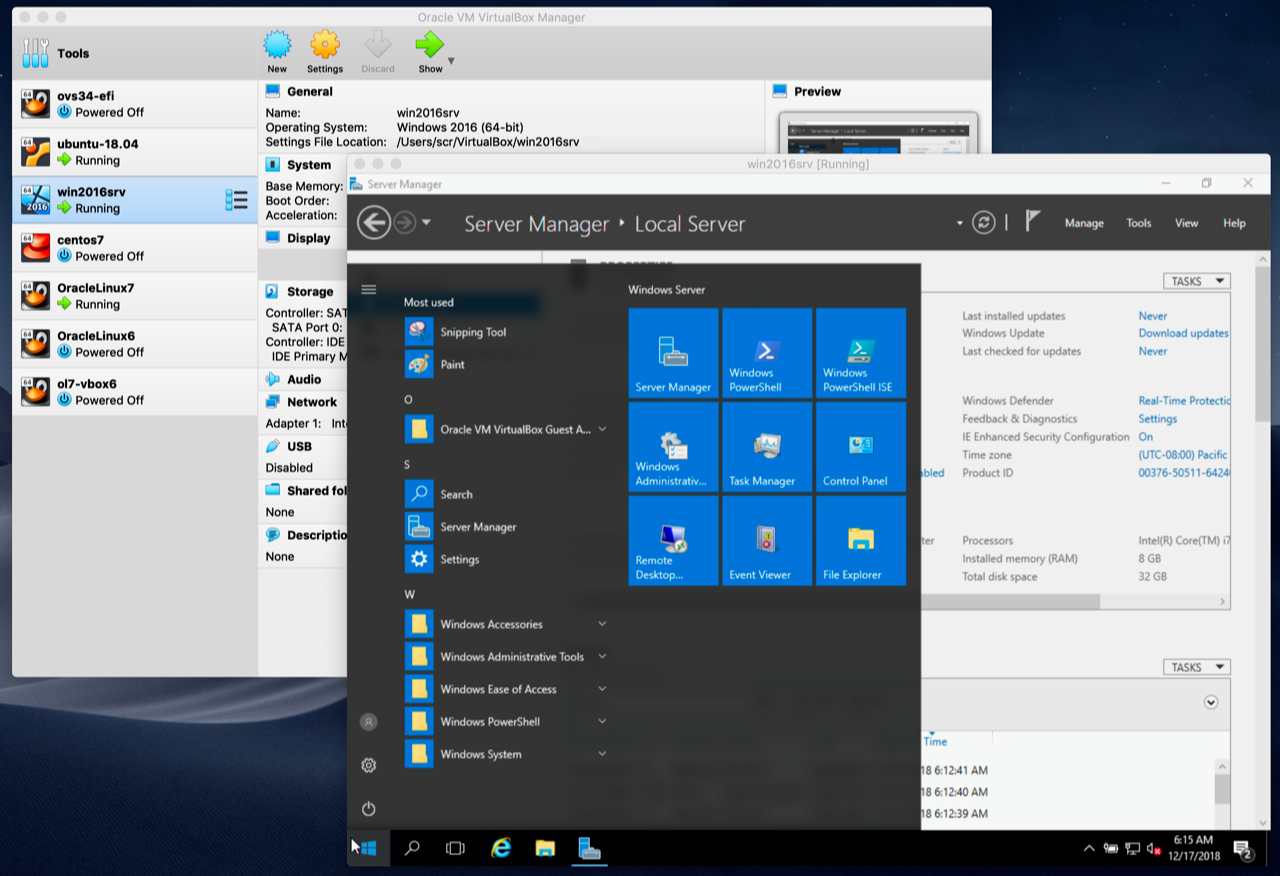
The following screenshot shows you how VirtualBox, installed on a Mac computer, is running Windows 7 in a virtual machine window:


In order to run VirtualBox on your machine, you need:
  • Reasonably powerful x86 hardware. Any recent Intel or AMD processor should do.
  • Memory. Depending on what guest operating systems you want to run, you will need at least 512 MB of RAM (but probably more, and the more the better). Basically, you will need whatever your host operating system needs to run comfortably, plus the amount that the guest operating system needs. So, if you want to run Windows XP on Windows XP, you probably won't enjoy the experience much with less than 1 GB of RAM. If you want to try out Windows Vista in a guest, it will refuse to install if it is given less than 512 MB RAM, so you'll need that for the guest alone, plus the memory your operating system normally needs.
  • Hard disk space. While VirtualBox itself is very lean (a typical installation will only need about 30 MB of hard disk space), the virtual machines will require fairly huge files on disk to represent their own hard disk storage. So, to install Windows XP, for example, you will need a file that will easily grow to several GB in size.
  • A supported host operating system. Presently, we support Windows (XP and later), many Linux distributions, Mac OS X, Solaris and OpenSolaris.
  • A supported guest operating system. 
For Further assistance: